Users, Roles & Permissions
This section controls who can log into your account, which branches they can access, and what they're allowed to do in the system.
Users
Go to Branches, Users & Security → Users → Create.
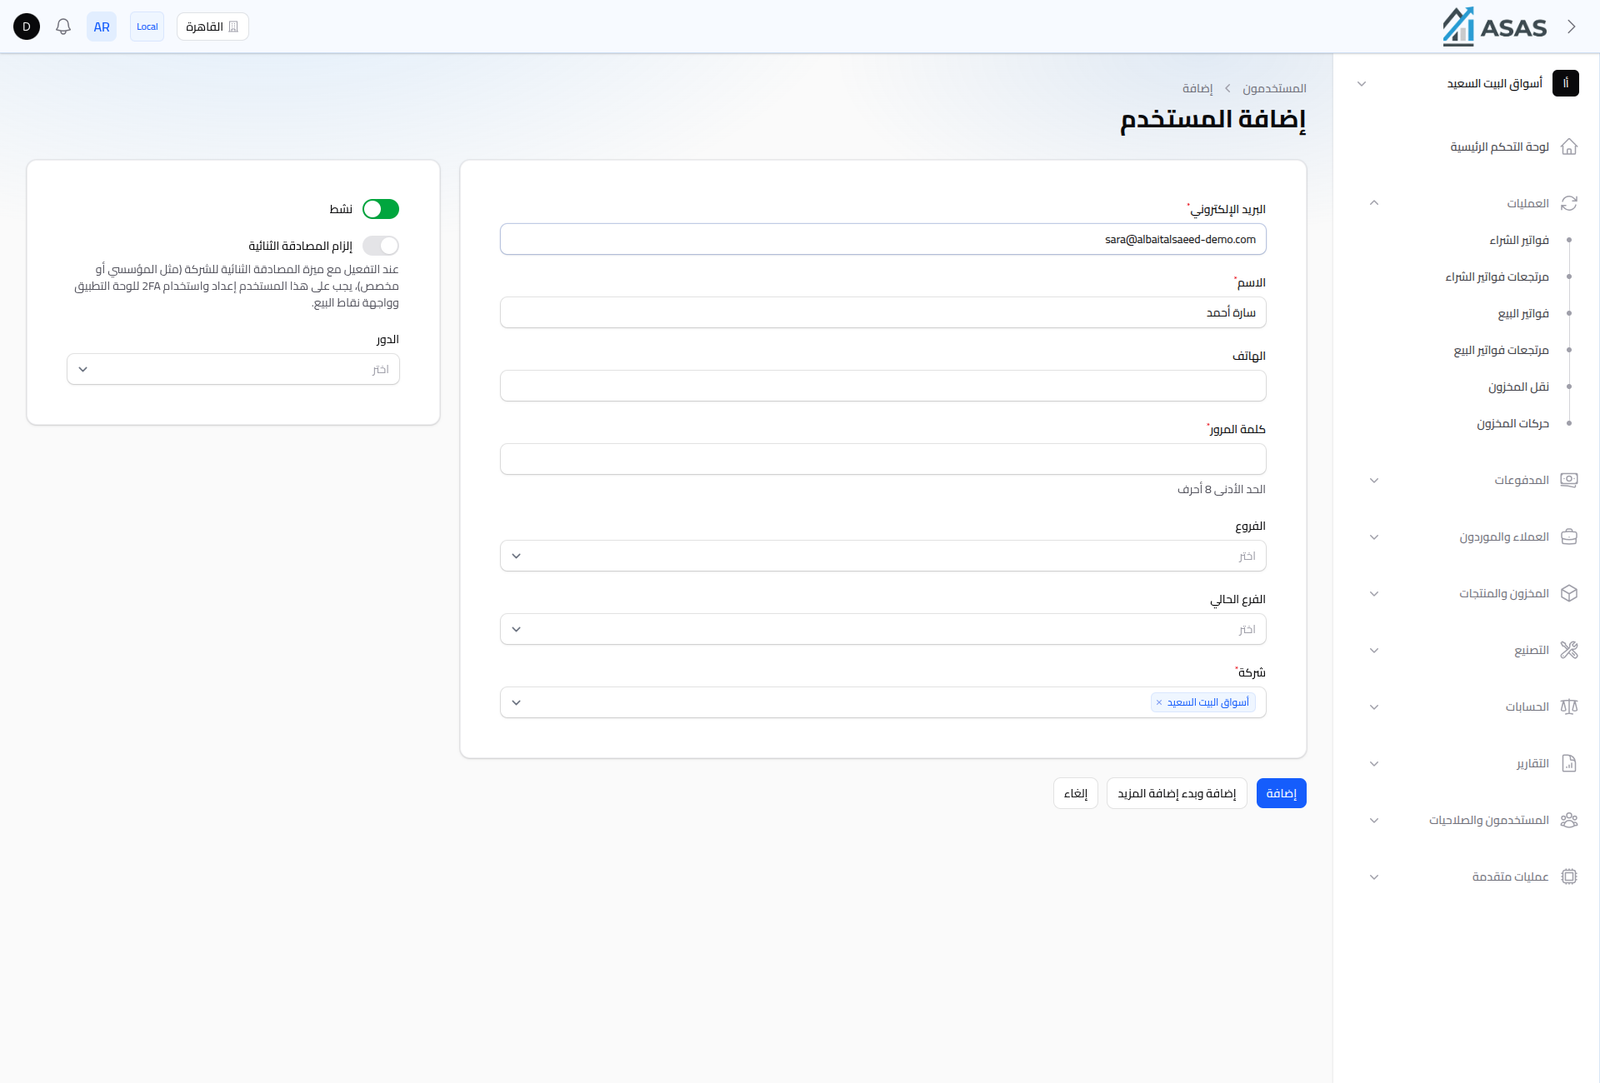
- Email: if the email is already registered to another user (outside your account), the system shows a hint indicating whether you can link them to your account (you can't link a Super Admin account or a user already in the same account).
- Name, Phone, Password (min. 8 characters): only shown when creating a brand-new user.
- Role: the user's functional role within this account (see Roles below).
- Require Two-Factor Authentication: enforce it for this specific user (only shown if this feature is enabled on your plan).
- Branches: which branches this user can access.
- Current Branch: the default branch the system opens to for this user (from the branches selected above).
- Company: the account (tenant) this user belongs to — only shown for users with access to more than one account.
Roles
Go to Branches, Users & Security → Roles → Create.
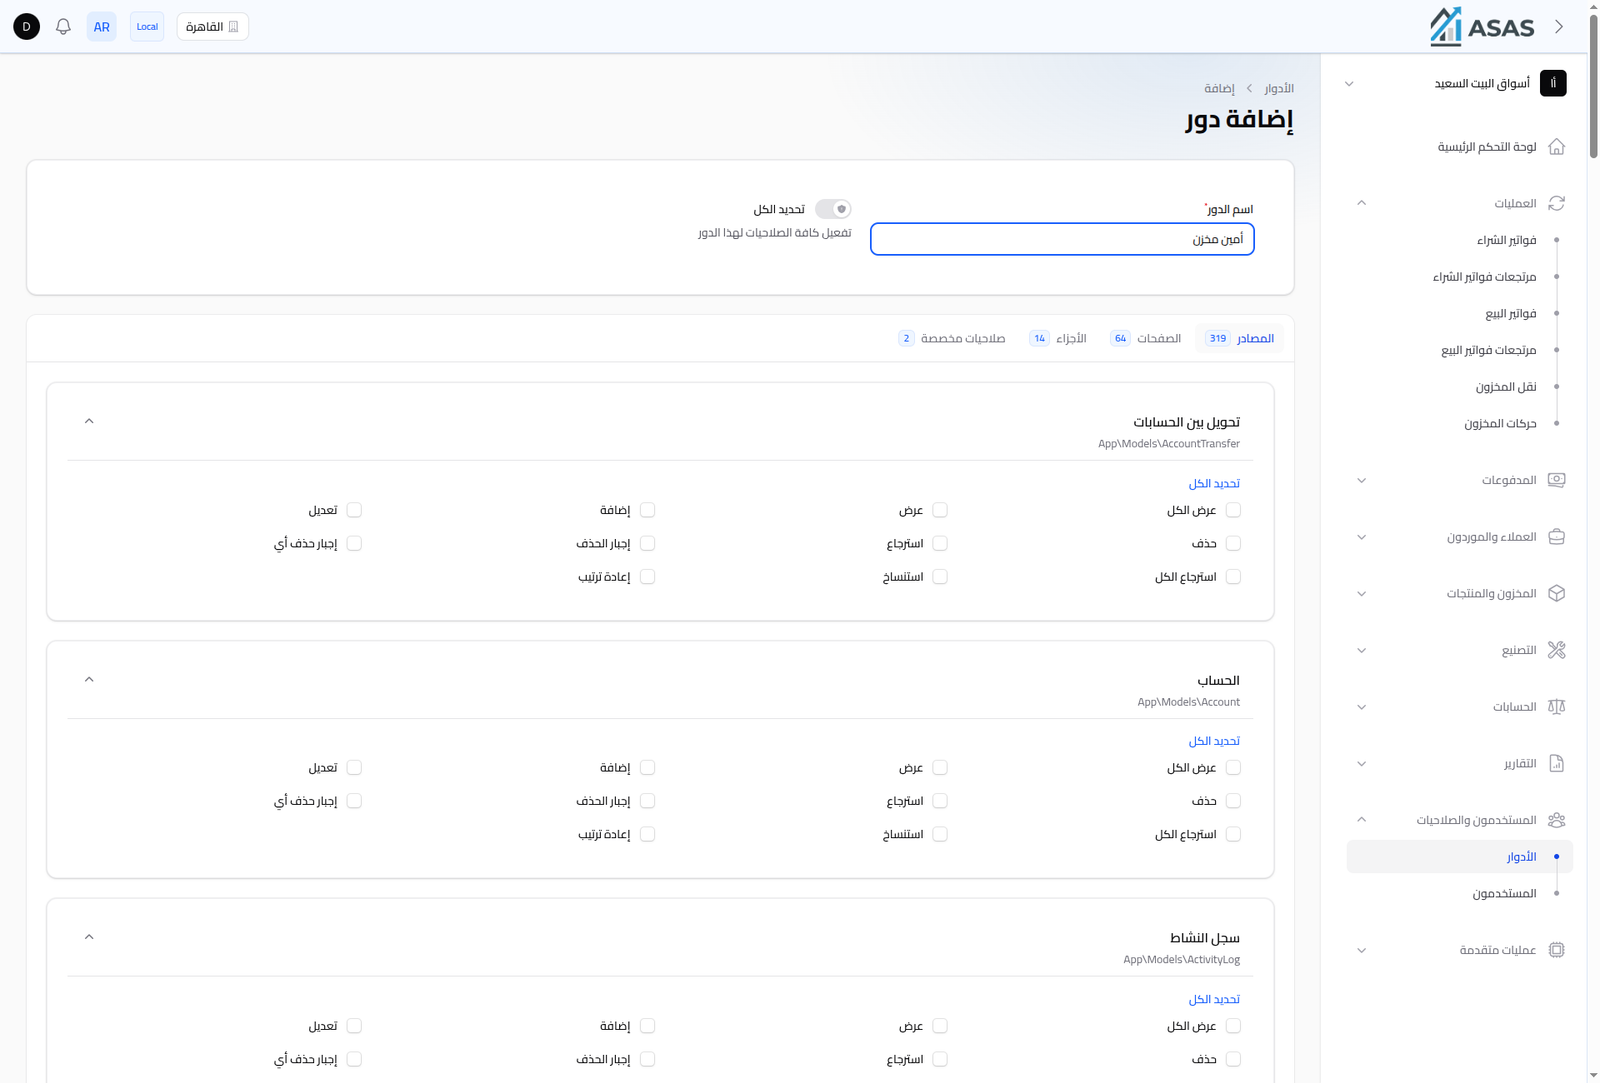
- Role Name: required (e.g. "Warehouse Keeper", "Accountant", "Cashier").
- Select All: enables every permission at once for this role.
- Below that, a list of every data model in the system (Accounts, Products, Invoices...), each with its own set of permissions:
- View / View Any
- Create
- Update
- Delete / Delete Any / Force Delete Any
- Restore / Restore Any
- Replicate
- Reorder (for reorderable items)
- The Select All button at the top of each section enables every permission for that model only.
Once a role is created, assign it to a user from the Create/Edit User screen above.
Notes
- Permissions are scoped to the current account (tenant); they don't automatically carry over between different accounts for the same user.
- See also Activity Log to track what each user does in the system.