Creating a Sale Invoice
You can create sale invoices outside the POS, directly from the admin panel — useful for account/credit customers or invoices that don't need a live cashier session.
Go to Operations → Sale Invoices and click Create:
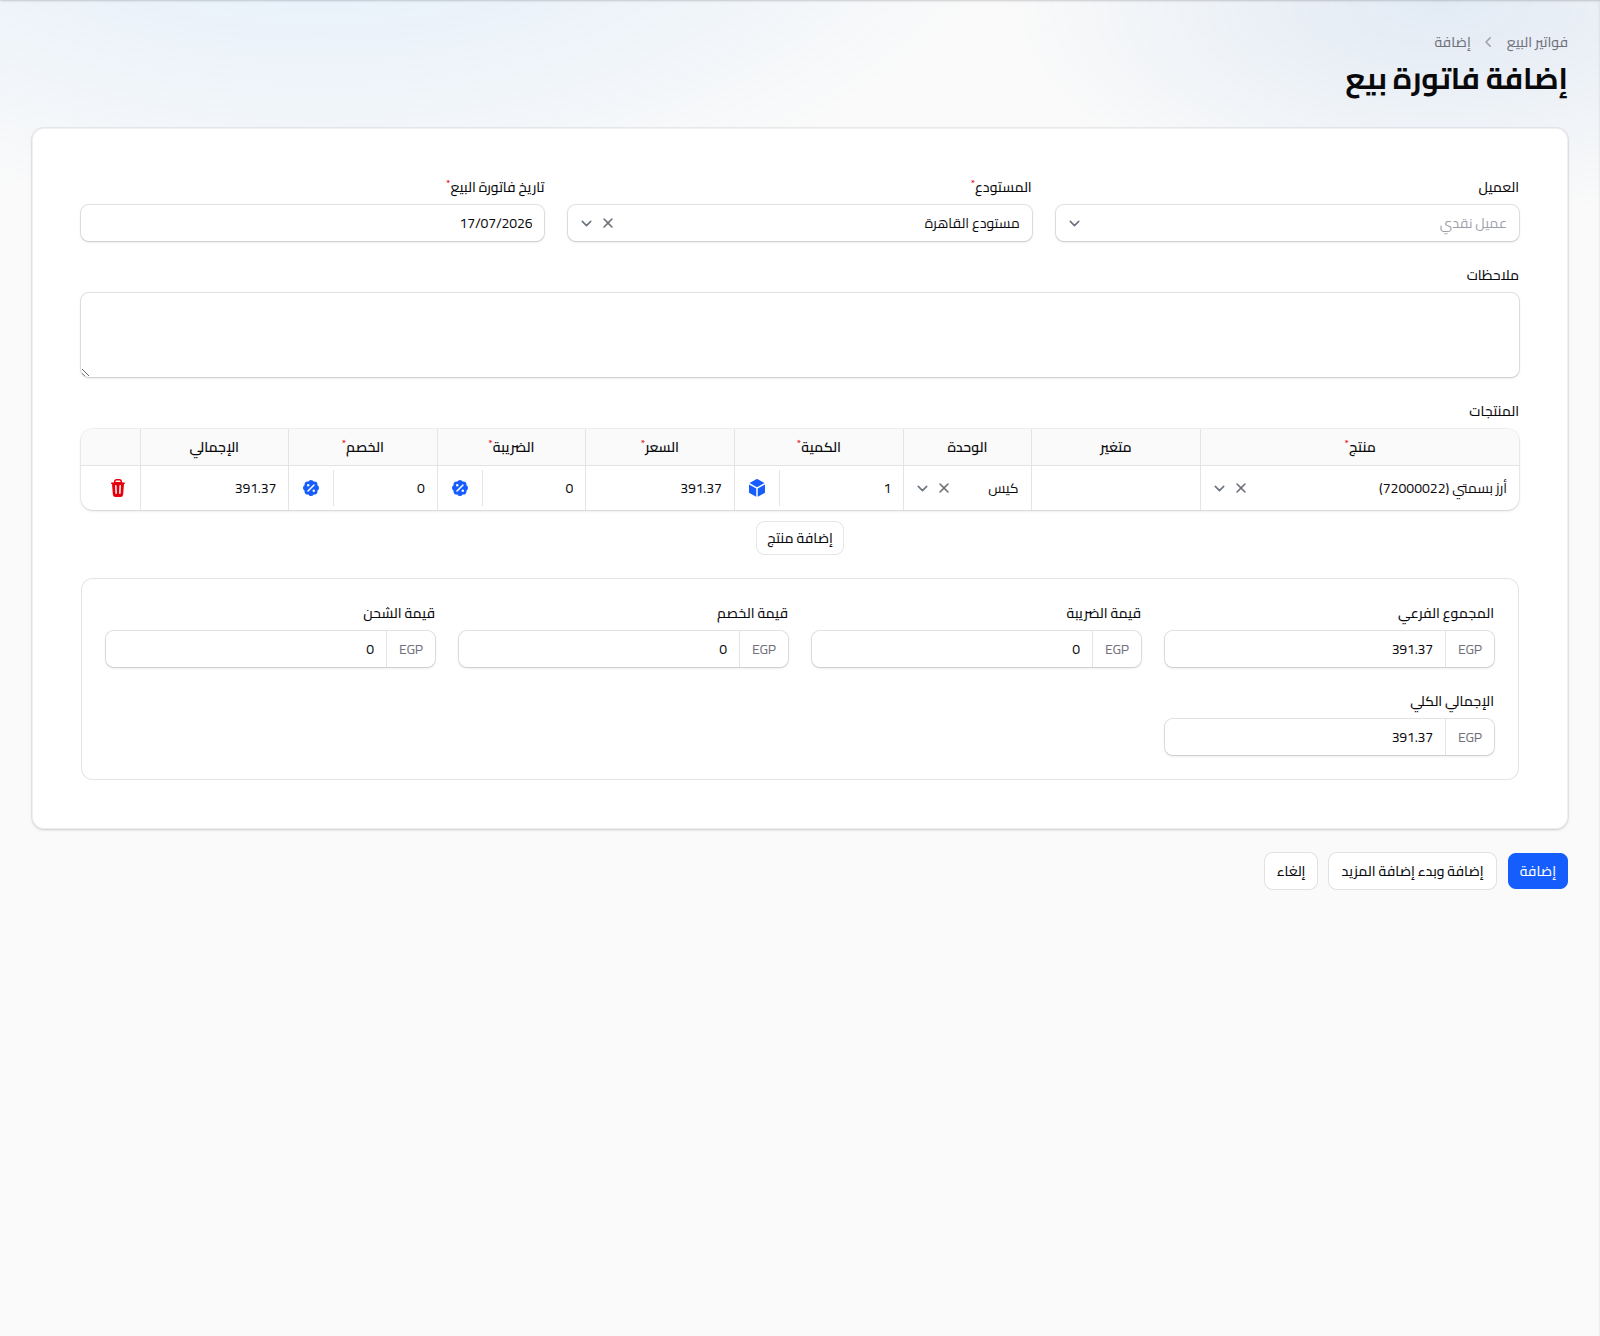
Fields
- Customer: optional — leave empty for a cash (walk-in) customer.
- Warehouse: (required) the warehouse stock is deducted from; defaults to the first active warehouse in the current branch.
- Sale Date: (required) defaults to today, editable.
- Notes: optional free text.
Product Table
Click Add Product for each line item, then for each row:
- Product: search and select from the product catalog.
- Variant: only shown for products with variants (e.g. size/color).
- Unit: only shown for multi-unit products; the default sale unit is pre-selected.
- Quantity: capped by the stock available in the branch's warehouses; the icon button beside the field shows the maximum sellable quantity.
- Price: auto-filled based on the customer's price tier (retail/wholesale) and editable; a warning appears if the price is below purchase cost.
- Tax and Discount: each has a toggle to switch input between a percentage % and a fixed amount — click the icon beside the field to switch.
- Total: calculated automatically per row.
Below the table, the invoice totals are shown: subtotal, tax amount, discount amount, shipping amount (editable), and grand total.
Saving
- Create: saves the invoice and returns to the list.
- Create & create another: saves the current invoice and immediately opens a new form — useful for entering several invoices in a row.
- Cancel: discards the input and returns to the list.
Notes
- Once saved, editing the invoice reveals Amount Paid and Balance Due fields.
- To record a return against this invoice, see Sales Returns.
- To add a new customer before the invoice, see Customers.