Returns at the POS
Take back products a customer previously bought, refund the amount, and add the quantity back to stock.
On the POS screen, click the Sales Return button (next to the Sale button at the top-left) to switch to return mode.
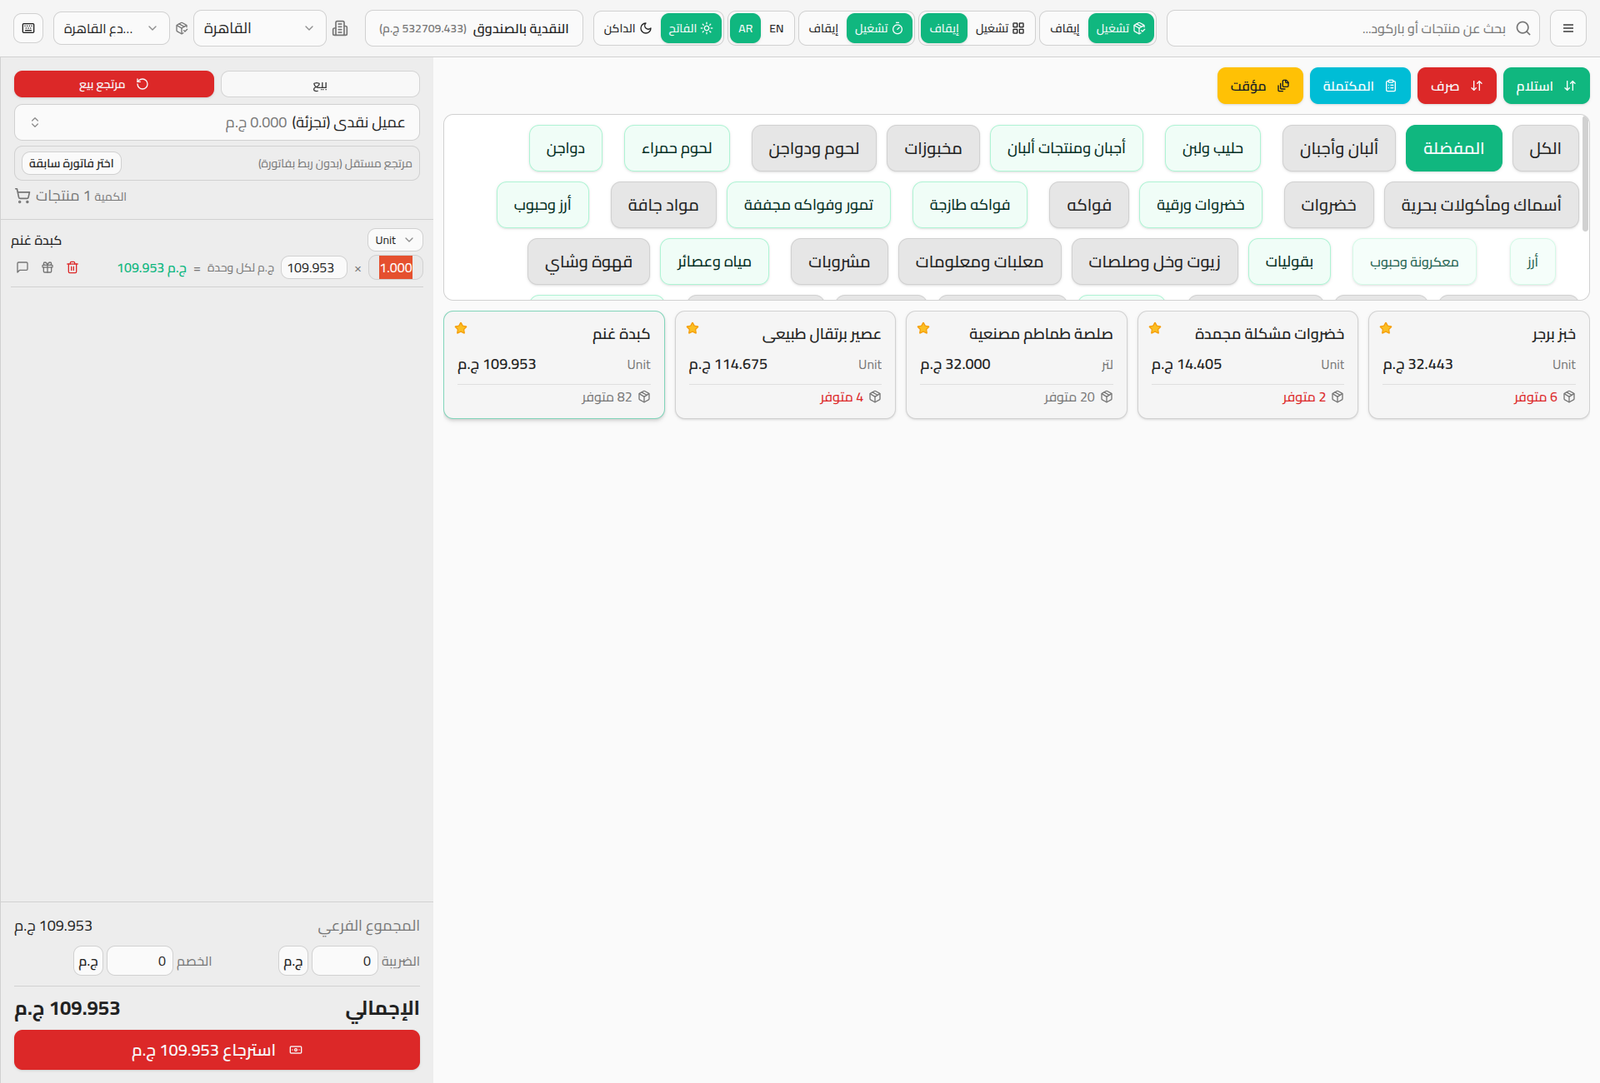
Linking to a Previous Invoice (optional)
Click Choose Previous Invoice to link the return to a specific sale invoice (the system shows it as an "Independent Return" if not linked). Linking to an invoice helps track the reason for the return, but isn't required to complete the operation.
Adding the Returned Products
Add the products being returned the same way as in normal sale mode (product card or barcode scan). The total and the bottom button turn red and show Refund [amount] instead of "Pay".
Confirming the Refund
Click the Refund button to open the refund dialog, and pick the refund account (cash or otherwise) the same way you'd pick payment accounts on a sale.
Notes
- Completing the return immediately adds the returned quantity back to the current branch's stock.
- Whether a return price above retail is allowed is controlled by a branch setting (see Branches).
- To switch back to normal sale mode, click the Sale button next to the return button.